Published on Dec. 8, 2021
Hatchery hygiene, part 2 Clean and Disinfect
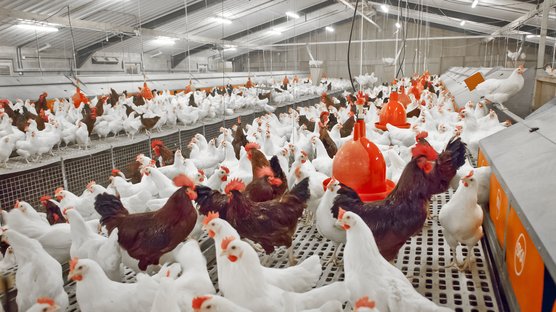
The basis for running a successful hatchery lies in having a healthy breeding flock, a clean hatchery with clear processes and dedicated people taking good care of the birds’ health and welfare and following the processes to safeguard optimal quality during all processes, from breeder flock management, to hatching egg collection and storage and incubation and chick handling. Any deviation during the process can result in poorer bottom-line results.
In the second part of this article we provide practical know-how to improve hatchery hygiene via cleaning and disinfection and the monitoring of hatchery hygiene. Please note that it will be impossible to have a hatchery completely free of micro-organisms, even when the strictest biosecurity rules are implemented. The environmental conditions inside a hatchery are the perfect ground for micro-organisms to survive and thrive. The good thing is, regular cleaning and disinfection will control the multiplication of microorganisms effectively.
Procedure
It is essential to clean prior to disinfection since organic material inhibits the chemical action of disinfectants. Good cleaning also removes up to 85% of microorganisms. Instructions for cleaning and disinfecting every hatchery room or any hatchery equipment should be formulated and clearly displayed in the relevant area. The following general routine is recommended:
- Remove all loose debris such as fluff and eggshells.
- Cover the entire area with soap and soak for about 15 minutes.
- Remove soap together with suspended ‘dirt’.
- Allow to dry properly as any remaining water will over-dilute the disinfectant.
- Apply the disinfectant according to the manufacturer’s instructions. Read the label carefully.
Table 1 provides guidelines for the frequency with which the hatchery rooms and equipment should be cleaned and disinfected.
Products: soap and disinfectant
As many suppliers of soap and disinfectant products exist it can be hard to make a choice, as to which one should you use? Consider at least the following points when choosing chemicals for cleaning and disinfection and discuss these with your supplier:
- pH-values: Alkaline soaps remove organic dirt (protein, fat) and acid soaps remove mineral deposits (such as calcium). Depending on water hardness, the occasional use of acid soap will help maintain smooth surfaces.
- Foam or non-foaming: In washing machines non-foaming soaps should be used. To increase the contact time between soap and dirt, a foaming soap should be used for hatchery rooms and equipment; the use of foam allows for excellent cleaning results with relative low water pressure.
- Compatibility: Check that the soap does not render the disinfectant ineffective.
- Range: Broad-spectrum disinfectants provide efficacy against a variety of micro-organisms and are preferred over narrow-range disinfectants, unless these are needed to remove specific pathogens such as Aspergillus. l Residual activity: To help avoid recontamination
- Method of application: For example, room disinfection requires gas or fog, while setter disinfection is best achieved with a spray. l Corrosiveness: Some chemicals used for cleaning and disinfection are very corrosive to certain materials. Check which materials are used in the hatchery equipment (see the technical specifications in user manuals) and ensure the chemicals are safe to use with these materials. l Safety for hatchery staff and environment: Provide protective clothing and masks for the cleaning staff.
- Pricing: Cheaper is not necessarily better. Also consider the concentration required when comparing products. Commercial disinfectants often contain more than one active ingredient which complement each other in the fight against a wide variety of pathogens – together with buffering agents, wetting agents, sequestering agents etc., to ensure their efficacy in contact with organic matter, in cold water, in low and high pH and to increase the shelf life. It is important that every cleaning and disinfection should be recorded. A cleaning schedule will help to plan and track the various cleaning and disinfection activities. It is advised to review the cleaning schedule regularly and especially when your microbial monitoring indicates any deterioration in hygiene status.

Hatchery hygiene monitoring
Hatchery hygiene monitoring is an essential element of any hatchery quality assurance program for the evaluation of cleaning and disinfection procedures. It is crucial to conduct the monitoring program on a routine basis, for example once every two weeks. To avoid dissuading hatchery personnel from just devoting extra attention to cleaning and disinfection prior to a scheduled hatchery hygiene monitoring, it is advisable to monitor occasionally at unscheduled times. The following three levels of hatchery hygiene monitoring can be recognized:
Visual inspection: Once visual dirt is present, one can rest assured there will also be a high number of micro-organisms. During inspection attention should not only be paid to the surfaces that can easily be reached, but especially to the hard-to-reach surfaces, such as the undersides of doors, the back of cooling coils and the outlet pipe of hatchers.
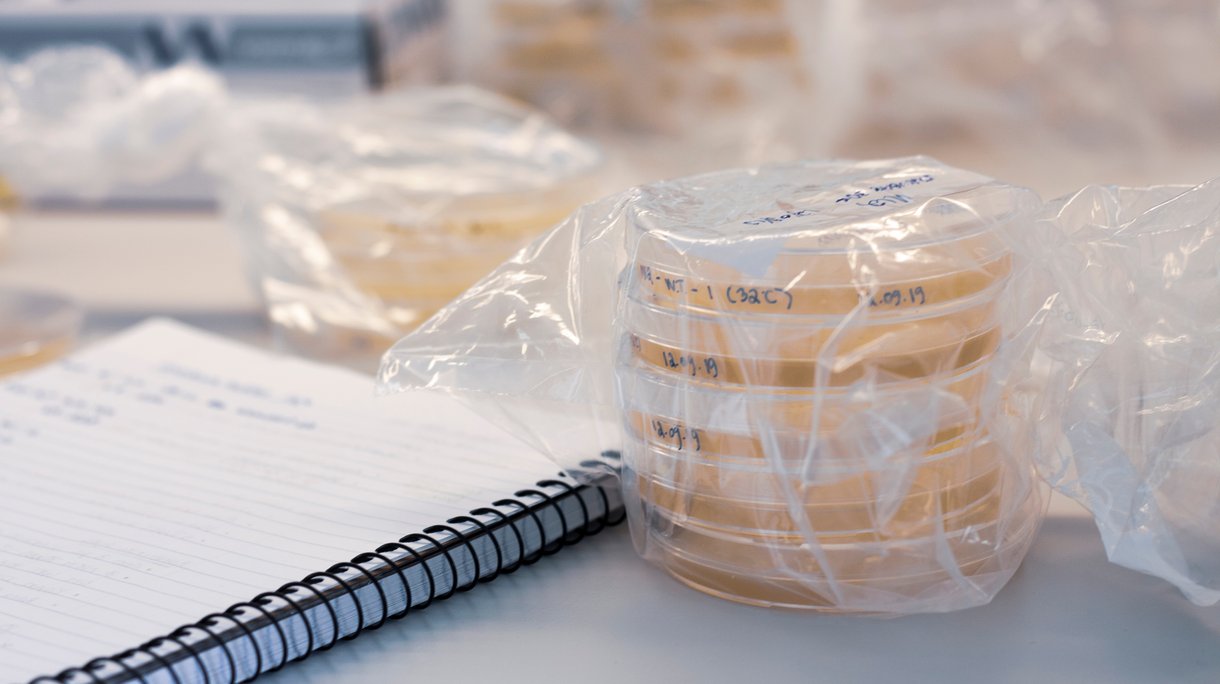
Agar-cultures for non-specific bacteria and fungi: Here, guidelines are restricted to the routine program which involves the sampling of air and surfaces in rooms used for hatchery practice. The purpose of sampling is to evaluate the effectiveness of a sanitation program and should be performed only after a clean-up has occurred. For microbial monitoring, use is often made of solidified agar in petri dishes containing nutrients matching the metabolic needs of bacteria and fungi. If bacteria and fungi are present, they will grow on this media when incubated. They will multiply and become visible as colonies. The number of these colonies is an indication of the hygienic state of the surface sampled.
For inspecting flat surfaces (walls, ceilings), one of the following methods may be used:
Swab and streak procedure: Rub a sterile swab that has been moistened in a sterile solution or a manufactured sterile culturette over a predefined area (2.5-5.0cm) of sample surface. Then gently streak over the surface of an agar plate several times in a zig-zag fashion
Rodac plate procedure: ‘Rodac’ stands for Replicate Organism Detection and Counting. Rodac plates are plastic plates where the base is filled with agar gel. This agar layer is slightly higher than the edge of the plate so that direct contact is made with the surface to be sampled. Remove the cover of the plate and press the agar gently on the surface to be monitored (do not move while contact is made). The cover should be replaced after the impression is made, taking care not to touch the agar. The Rodac plate can be used for monitoring air. Expose the Petri dish with the selected media by carefully placing the plate media-half on the bottom on a flat surface within the environment to be monitored. Gently remove the cover. Leave the media exposed to the air for the specified time. For relatively clean areas, a 10-minute sampling time is sufficient. The agar plates which are being evaluated for bacterial contamination should be incubated for 48 hours at 37-37.5˚C in a microbiological incubator or a setter (place the plates in a plastic bag and set where they will not be disturbed). Plates are incubated upside down so that drops of condensation will not fall onto the inoculated surface. After incubation, the colonies on the agar media can be counted and recorded.
Evaluating and monitoring hygiene conditions should be based on the hatchery’s own criteria. In general, an excessive number of colonies indicate poor sanitation procedures or a hatching egg production problem. For detailed advice on sampling, reading and evaluating agar plates, see instructions and advice from the agar media manufacturers. It is advisable to maintain records of all results so that changes occurring over time can be observed in the various areas being monitored. The results should also be carefully correlated with hatchability and livability data.
Specific bacterial and fungal monitoring: A more intense monitoring program requires bacterial and fungal identification. Samples could involve swabs, Rodac plates, fluff, paper from chick boxes, unhatched eggs and even day-old-chicks. Samples have to be properly taken, packed and sent to specialized laboratories according to their instructions. Results are forwarded to the hatchery after the tests have been conducted.
Table 1. recommended cleaning and disinfection frequency for the hatchery rooms and equipment
| Room | Cleaning frequency | Room and equipment | Cleaning frequency |
|---|---|---|---|
| Egg receiving room | Once every week | Hatcher room | Once every week |
| Egg storage | Once every week | Hatchers | After each hatch |
| Egg setting room | Once every week | Chick handling room | After each handling |
| Setter room | Once every week1 | Chick dispatch room | After each handling |
| Setters | After each incubation cycle |
Racks, egg trays, hatcher baskets, chick boxes |
After each use |
| Egg transfer room | After each handling | Egg and chick trucks | After each egg/chick delivery |
Conclusion
Hatchery hygiene is essential when the goal is to optimize hatchery results and chick quality. A well functioning cleaning, disinfection and hygiene monitoring program helps to prevent economic losses in your hatchery operations and contributes to the safety of the entire egg production chain. The goal of your hatchery hygiene program should be the prevention of pathogens from entering and the inhibition of pathogen development to optimize the hygienic status of your hatchery. Frequent monitoring of the different hygiene processes is essential and take corrective action to achieve the required improvement. Do not forget, better chick quality tomorrow starts with a cleaner hatchery today.